
If you use Windows Subsystem for Linux (WSL2) or Docker Desktop for development, you have likely run into the dreaded "Out of Space" warning on your C drive. You look at your user directory, run disk cleanups, and prune Docker containers—but nothing seems to free up the space.
Then, you locate the culprit: a giant file named ext4.vhdx occupying 60GB, 100GB, or even more space. Even after deleting files inside your Linux terminal or running docker system prune, this virtual disk size refuses to shrink. Why?
In this guide, we'll explain why the WSL2 disk expands but never contracts, and show you the exact, step-by-step commands to safely compact this virtual disk and reclaim your gigabytes of C drive space.
Why Doesn't WSL2 Auto-Shrink?
WSL2 runs inside a lightweight utility VM. It stores your Linux files in a virtual hard disk file (VHDX format). This file is configured as a **dynamically expanding disk**.
- Dynamic Expansion: When you download packages, spin up Docker databases, or write code in WSL, the
ext4.vhdxfile automatically expands on your Windows drive to make room. - No Auto-Contraction: When you delete files *inside* Linux, the OS marks that space as "free" in its filesystem, but the outer Windows
.vhdxfile does not shrink. Windows doesn't automatically know that sectors inside the virtual disk are now empty, leaving you with "ghost" disk consumption.
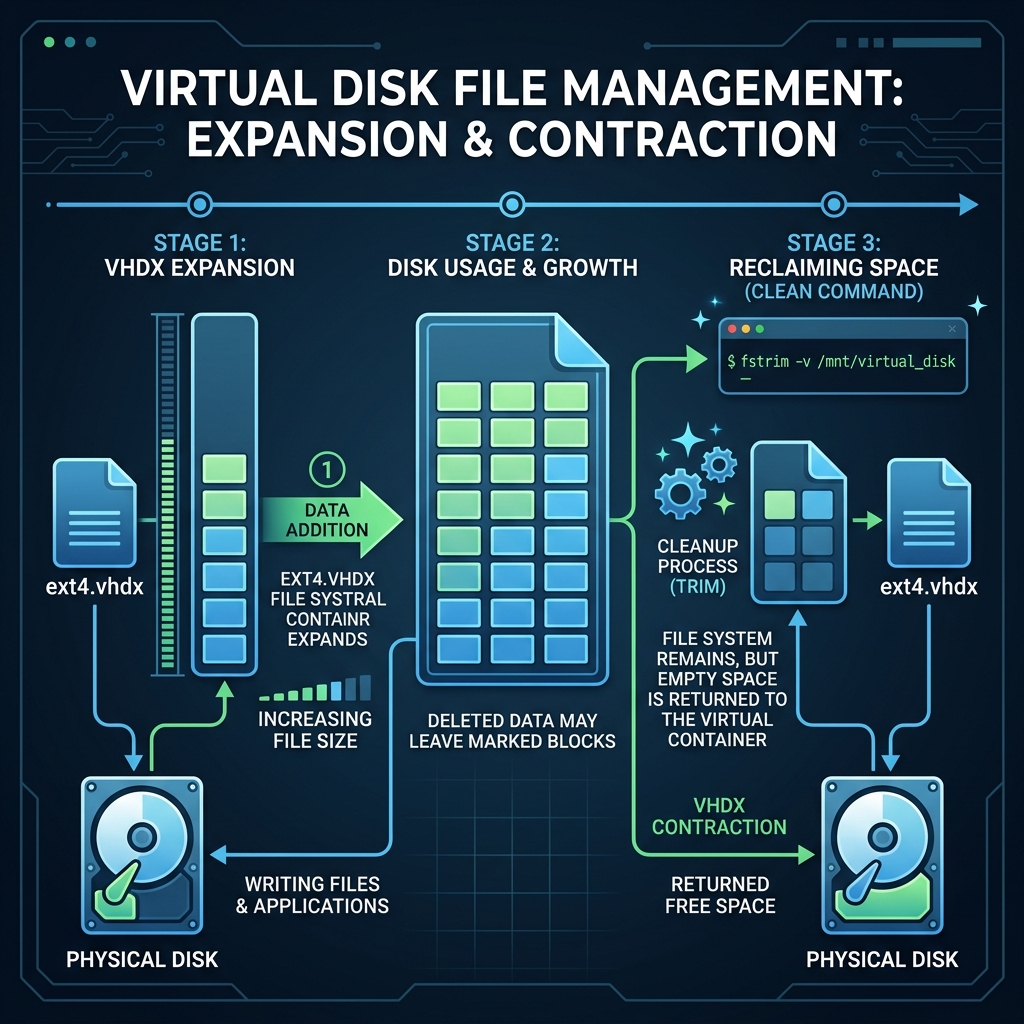
To fix this, you must run a compacting utility from Windows while the virtual disk is offline. Let's look at how to do it.
Step 1: Locate Your ext4.vhdx File
Before compacting the disk, you need the exact path to your ext4.vhdx file. Here are the default locations:
For Standard Ubuntu Distribution:
C:\Users\YOUR_USERNAME\AppData\Local\Packages\CanonicalGroupLimited.UbuntuonWindows_79rhkp1fndgsc\LocalState\ext4.vhdx
For Docker Desktop Data (if using WSL2 backend):
C:\Users\YOUR_USERNAME\AppData\Local\Docker\wsl\data\ext4.vhdx
Note: Replace YOUR_USERNAME with your actual Windows account name. The AppData directory is hidden by default, so you may need to type the path directly into the File Explorer address bar.
Step 2: Shut Down WSL2 and Docker
You cannot compress a virtual disk while it is actively in use. If you attempt to compact it while WSL2 or Docker is running, you risk corrupting your Linux filesystem.
- If you are using Docker Desktop, right-click the Docker tray icon and select Quit Docker Desktop.
- Open PowerShell or Command Prompt (as Admin) and force WSL to shut down completely:
wsl --shutdown
- Verify that all instances are stopped:
wsl --list --verbose
Ensure the status of all distros reads Stopped before proceeding.
Step 3: Compacting the Disk (The Universal Method)
We will use Windows' built-in Diskpart utility. This tool is installed on all Windows editions, including **Windows Home** and **Windows Pro**.
- Open PowerShell or Command Prompt as **Administrator**.
- Launch the disk part utility:
diskpart
- Select your virtual disk file (enclose the path in double quotes):
select vdisk file="C:\Users\YOUR_USERNAME\AppData\Local\Packages\CanonicalGroupLimited.UbuntuonWindows_79rhkp1fndgsc\LocalState\ext4.vhdx"
- Attach the disk as read-only. This is a critical safety step to prevent locks:
attach vdisk readonly
- Run the compact command:
compact vdisk
Diskpart will now scan the VHDX file, identify the deleted blocks, and compact the file on your SSD. This can take anywhere from 1 to 10 minutes depending on your disk size and drive speed.
- Once it reaches 100%, detach the disk and exit:
detach vdisk
exit
Alternative Method: Pro/Enterprise Users (PowerShell)
If you are running **Windows Pro or Enterprise** and have Hyper-V management tools enabled, you can run a single-line PowerShell command without opening Diskpart:
Optimize-VHD -Path "C:\Users\YOUR_USERNAME\AppData\Local\Packages\...\ext4.vhdx" -Mode Full
Warning: If you get a command unrecognized error, it means you are either running Windows Home or do not have Hyper-V features enabled. Stick to the Diskpart method above.
Summary of Space Reclaimed
After running this process, check the size of the ext4.vhdx file. Most developers reclaim 30% to 70% of the space, turning a bloated 80GB file back into a lean 20GB disk. You can now launch WSL2 or Docker Desktop again; the virtual disk will mount automatically and work exactly as before, leaving your actual Linux files completely untouched.